
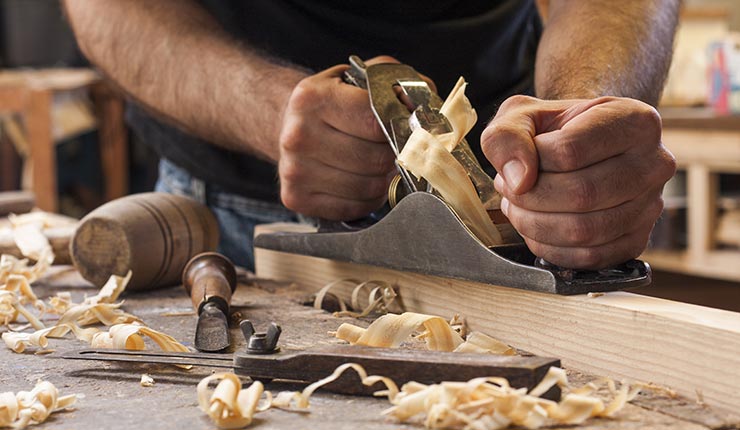
If you're planning to build a deck you might have been wondering how to make a Kregjig. These are the basics to help you make your first pocket hole. The first step is to line up your pocket hole pencil marks with the lines on the Kreg Jig, called the "A" and "C" lines. Next, align your pocket hole pencil marks with the lines on the Kreg Jig. After everything is aligned, clamp the wood with the Kreg Jig. To tighten the clamp, you can adjust the lock nut to lock it into place.
Using a Kreg Jig
Kreg jigs can be used to do a wide range of woodworking tasks. You can use the Kreg jig to make frame and panel doors. You can also use the jig to attach door trim miter joints. The jig also can be used for bookcases as well as many other types. You can purchase various sized Kreg screws and use them as you see fit.
The Kreg jig is only suitable for pocket holes if the wood used is at least 3/4 inches thick. Although it sounds like a one-by four, a 1x4 is actually a 3/4" thick board. A chart is included with the jig that shows you how to set your screws and how deep the wood should be.
Making pocket holes
You can make pocket holes using a Kreg Jig, regardless of whether you're building furniture from scratch or renovating your home. While most pocket hole drills use a traditional bit, the Kreg Pocket Hole Jig features a drill guide that allows you to accurately gauge the depth of the hole and the width of the opening. Simply by holding the gauge against a piece wood, the depth collar on the jig can be adjusted to accurately adjust the hole's depth. The clamp on the jig stops the pocket hole jig sliding while drilling.
A Kreg jig can be used to create wooden furniture. Its design allows for easy creation of mitered frames as well as a variety in hole spacing options. You can find the owners manual online, which can help you get started. To use the Kreg Pocket-Hole Jig, you will need Kreg Pocket-Hole Screws. The jig can be used to miter corners at 45 degrees and ensure tight fitting between two pieces.
Setting the depth collar on the drill bit
Before using a Kreg Jig to drill a hole, you should set the depth collar on the drill bit. A depth collar is a small piece of hardware that fits inside a drill bit slot. The depth collar is adjustable and can be used to drill the exact depth of the hole. It includes an Allen wrench. Adjusting the depth collar is as easy as lining up the bottom edge on the drill bit with 3/4-inch mark on Kreg Jig.

Kreg Jigs include a special stepped drillbit and a depth collar to adjust the depth of the hole. The drill bit has a depth collar that must line up with a guide mark on the jig before drilling. The drill bit will stop at the right depth once it is set. It is important to use a depth collar that is set to the depth of the wood and the thickness of the wood.
FAQ
What tools are best to begin with when I become a woodworker
Woodworking is an art form that requires patience and practice. It takes time to master all the tools and techniques involved in woodworking.
There are many woodworking tools on the current market. Some people prefer using power tools while others prefer hand tools.
While you have the option to pick what you like, it is essential that you get the right tool for the job. It may be a good idea to start with a basic set, if possible, if you don’t know much about hand tools.
You could also try learning how to use a router which is used to cut intricate shapes into wood. These routers can be purchased at most hardware and home improvement stores.
Is there anything else I should know about woodworking?
It's easy to underestimate the amount of work involved in making furniture. Finding the right kind of wood is the most difficult part. There are so many varieties of wood available that choosing one can be difficult.
A problem is that wood doesn't have the same properties. Some woods will warp over time, others will split or crack. These are important considerations to make before you purchase wood.
How often do I need to buy new supplies
You'll probably have to replace some of your tools over time. If you're using hand tools, you'll need to sharpen them regularly. Power tools will require replacement parts every so often. Spread your purchases over several months to avoid purchasing too many items at once.
How long does it take for furniture to be finished?
It depends on the type and complexity of your design as well as the amount of finishing that you use. For example, hardwoods require more maintenance than softwoods. Hardwoods tend to be more expensive that softwoods. They are more durable and can withstand moisture better. The process of finishing a piece of furniture typically takes anywhere from one week to three months.
Statistics
- In 2014, there were just over 237,000 jobs for all woodworkers, with other wood product manufacturing employing 23 percent; wood kitchen cabinets and countertop manufacturing employing 21 percent. (theartcareerproject.com)
- Average lumber prices rose about 600 percent between April 2020 and May 2021. (familyhandyman.com)
- Woodworkers on the lower end of that spectrum, the bottom 10% to be exact, make roughly $24,000 a year, while the top 10% makes $108,000. (zippia.com)
- The U.S. Bureau of Labor Statistics (BLS) estimates that the number of jobs for woodworkers will decline by 4% between 2019 and 2029. (indeed.com)
External Links
How To
How to make wood joints
This tutorial will demonstrate how to join two pieces together of wood. We will use the "pockethole joint," which means that we drill holes in the wooden pieces and then glue them together. This method works great if your wood is straight and smooth. Dowel joinery might be a better option if your wood is not straight or flat. Here are the steps
-
Drill Pocket Hole Joints. Measure and mark the location where you would like to place the pocket hole joint. Use a jigsaw or handheld drilling machine to drill 3/8 inch deep holes at the ends of each wood piece.
-
Sand Smooth. You can sand the edges of the wood to ensure that it doesn't split.
-
Glue Together Apply glue on both sides of the wooden plank. Let it sit for about 5 minutes before clamping the pieces together.
-
Fix the Pieces together. After the glue has dried you can attach the pieces to form a flush joint.
-
Trim Joinery. Trim any excess wood surrounding the joint once the glue has dried completely.
To be able to turn the pieces inside-out, leave enough room between them.