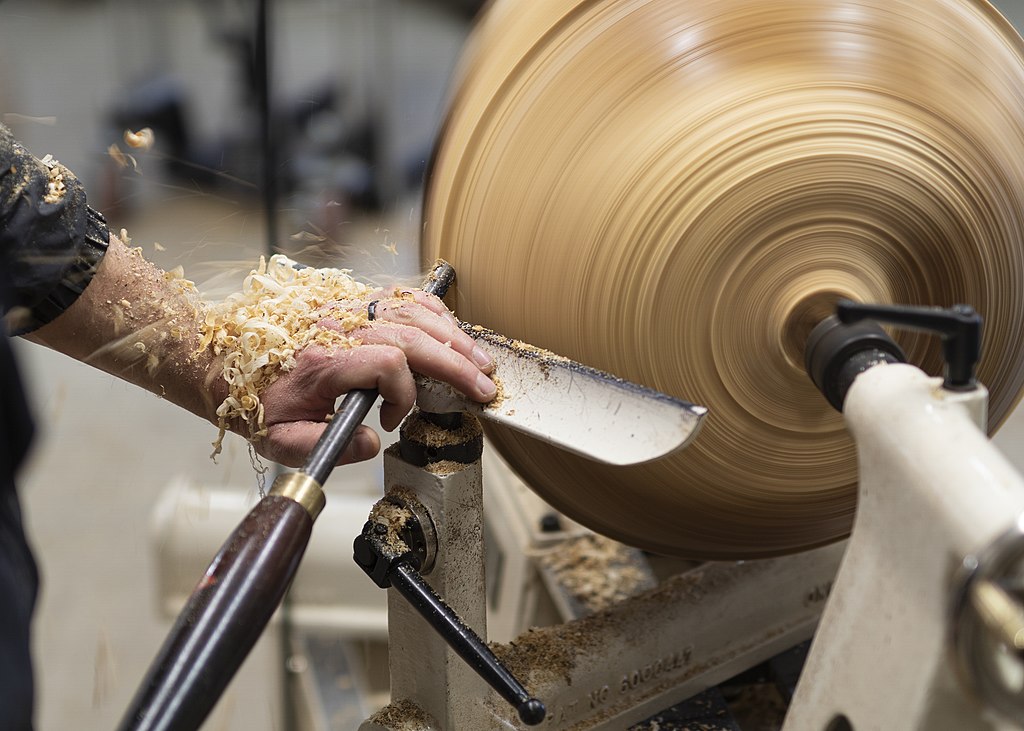
Ride the bevel, a fundamental turn technique, is essential. It involves several key steps. You hold the shaft of the tool in your hands and move it forward until the cutting edge touches the stock. As the tool advances, you slowly raise the handle until the cutting edge engages the stock, resulting in shavings. While riding the bevel, the tool does not cut the stock. Once the cutting edge engages the stock, you ease the tool back, raising the handle again only when the cutting edge is engaged with the stock.
Wood turning is an specialized branch in woodworking.
Wood turning is a popular hobby for those who love wood's tactile qualities and enjoy working with their hands. This specialized branch of woodworking can be a rewarding hobby for beginners and experienced woodworkers alike. Demonstrations should run between 6 and 10 minutes. You should keep most of your stock in place during the demonstration so you can work on your piece.
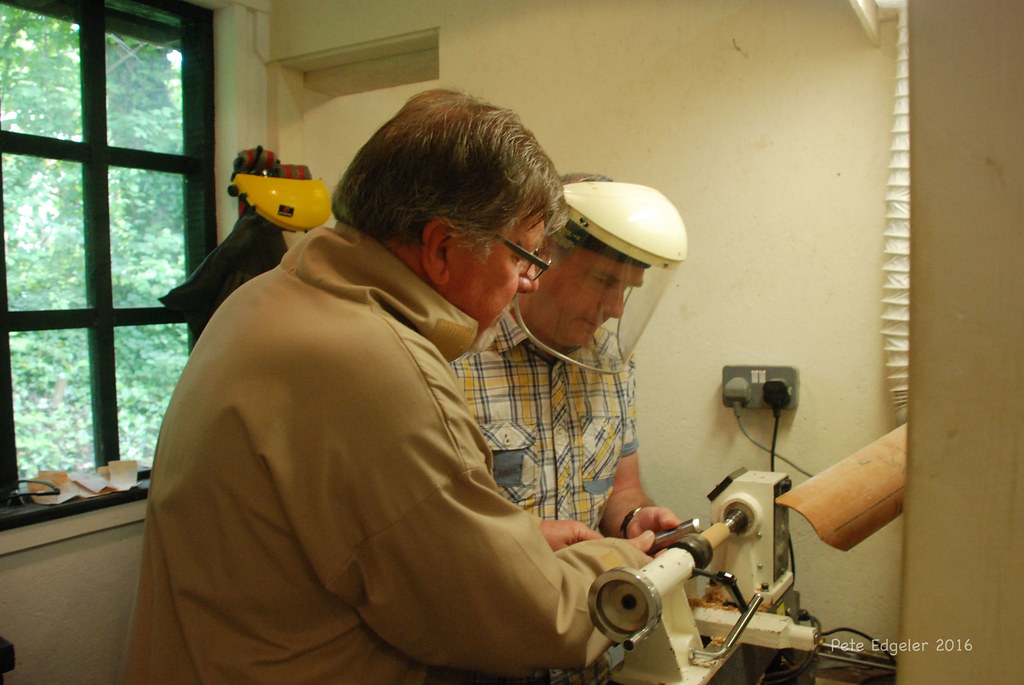
You should protect your eyes if you are going to woodturn. Wood turning involves inserting a sharp-edged metal tool into the wood. Protect your eyes with goggles, and protect your face from the burl by wearing a face shield. Wood dust can cause asthma, skin allergies, or even cancer. Finally, wood shavings from wood turning can cause skin irritation.
It requires less wood
While woodturning can be done with nearly any species of tree, some pieces are easier to turn than others. While woodturning stock can be made from any section of a tree, some parts of a tree have better grain and figure than others. These are some tips that will make your woodturning project run faster. First, select stable material. Make sure the lumber you choose is stable. You should also ensure that the bark is tight. Tight bark tends to resist checking and allows the woodworker to create a natural edge vessel.
A wooden blank can be used as a basic tool for turning. Locate a lumber yard to buy it. A big sawmill is able to cut large logs in smaller sections. Next, you can cut the sections with a bandsaw or table saw. DIYers can also cut the lumber to make blanks. The wood that is fleshly cut will need to be dried before it can be turned. This is important to avoid cracks when turning high quality wood.
It is more stable
A Swiss-Style Lathe can provide you with a more stable cutting experience. Bar stock is not always perfectly straight. However, it can cause vibrations that can alter tool wear and precision. Swiss-style machines produce less vibration because they don't use belt drives. To avoid harmonic vibrations from high speed rotation, the sliding headstack must move smoothly. The sliding mechanism's preloaded roller pads ensure smooth movement. The high speed rotation produces harmonic vibrations. Therefore, the sliding mechanism is able absorb these vibrations.
FAQ
What's the difference between a hobbyist and a professional woodworker?
Hobbyists are passionate about making things from wood, while professionals tend to be more focused on the quality and craftsmanship of their work. Hobbyists take great pride in their creations, and share them with family and friends. Professionals will spend hours looking at designs before they start to build a project. Professionals will be meticulous about all aspects of their work, from selecting the right materials to finishing it.
Which material would you recommend for woodworking lessons?
Start with softwood like pine, poplar and ash. After you are comfortable with the softwoods, move to hardwood.
How much will it cost to get started?
Since every project differs, it is impossible to give exact numbers. These factors will help you get an estimate of how much money is needed.
-
Materials cost
-
Tools and equipment
-
Time spent working on the project
-
Your hourly rate
-
How much profit can you anticipate to make
-
It doesn't matter if your goal is to hire help
If you're just starting out, you may decide to start small by making simple items such as boxes and picture frames. You will gain more experience and be able to tackle larger projects.
Where can I start woodworking?
The best way to learn how to build furniture is by building furniture. While you will need tools and make mistakes, you will eventually master the art of building furniture.
You should first choose the project you wish to complete. It can be something as simple and small as a box, or large-scale as an entertainment center. Once you have chosen a project, locate a local woodworker who is skilled in this kind of work. Ask your local woodworker to help you determine the right tools for you and where they are located. Maybe you can ask the person if they know of anyone who does this sort of work.
Are there any tips for starting a woodworking enterprise?
Starting a woodworking business is a lot of work. However, if you are passionate about your hobby you will be willing to put in the effort. You will probably love the challenge of starting your own business.
Remember that you may encounter unexpected problems when starting a new venture. You may run out of money suddenly. Perhaps customers won't pay you as much as you had hoped. You must be ready to deal with such situations in order to survive.
One tip is to have a separate banking account for your company. You'll be able to track how much money comes in and out.
How much should a Woodworker Charge per Hour?
The hourly rate for a professional Woodworker will vary depending on many variables, such as experience, skill level and availability.
A skilled woodworker can expect an hourly rate of $20-50.
An hourly rate of $10 for a less skilled woodworker could be possible.
How can I learn basic woodworking skills
Building a bench is a great way to get started in furniture building. You can use any wood you have in your home to complete this project. If you are unsure what type of wood is best, you can get cheap pine boards at Lowes (or Home Depot) instead. After building your bench, sand off any rough edges and apply a stain or varnish.
Statistics
- Average lumber prices rose about 600 percent between April 2020 and May 2021. (familyhandyman.com)
- Woodworkers on the lower end of that spectrum, the bottom 10% to be exact, make roughly $24,000 a year, while the top 10% makes $108,000. (zippia.com)
- In 2014, there were just over 237,000 jobs for all woodworkers, with other wood product manufacturing employing 23 percent; wood kitchen cabinets and countertop manufacturing employing 21 percent. (theartcareerproject.com)
- Overall employment of woodworkers is projected to grow 8 percent from 2020 to 2030, about as fast as the average for all occupations. (bls.gov)
External Links
How To
Here are some tips on how to drive nails in wood
To drive a nail into wood, the first step is to select the right size and type hammer. The most popular types of hammers include claw hammers as well as mallets and ball peenhammers. Each type has its strengths and weaknesses. A claw hammer works well when you're trying to hit nails with a heavy hammer. However it is difficult to precisely control where the blow hits. Although a sledgehammer can be used to hit large areas quickly, it is too heavy to be useful for small tasks.
Once you have chosen the right hammer for you, put your hand flat against its side so that it rests comfortably in the palm of your hand. Hold the handle in your hand, but don’t force it too hard that you break. The hammer should be held straight up with your wrist relaxed. Now, move the hammer towards the center of the nail by swinging it back. You should feel the impact from the hammer striking a nail. You can practice swinging the hammer with a block or wood until you feel the rhythm.
The hammer should be held close to your body when you are ready to begin driving the nail. You will need to position the nail so it is parallel to the wood. Keep your focus on the tip of each nail. Swing the hammer forward, then follow through with the motion of the hammerhead. Repeat this action several times, gradually increasing the speed of the swing. Once you've mastered the technique, try adding power to your swings. Then, raise the hammer from your shoulder to bring it down. You'll have more energy to work with.
Once you've nailed the first hole, remove the hammer from the nail. You can then remove the rest of the nails using a prybar or a screwdriver. To prevent splitting the wood, ensure you keep the nail heads flush against the board's surface.