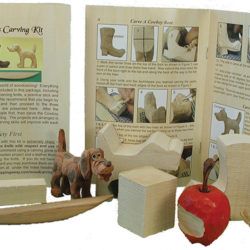
To begin carving a face in wood, select a piece of wood and make the required cuts. You can follow the expert's instructions using a step by step video. Carving the face will look more realistic if you use the progressing cut. The key to creating a lifelike visage is the progression of your noses on the piece of wood. In addition to the face outline, you may also choose colored dyes and shellac to add a realistic finish.
Hardwoods
Before carving a face out of wood, it is important to consider what type of wood you will be using. Hardwoods are trees with broad leaves and can grow in a wide range of climate zones. Hardwoods can be used for building and furniture construction due to their versatility in strength, density, and appearance. Although hardwoods are less expensive than softwoods, they can also be strong and resistant to fire.
You might want to try wood carving if you are new to the art. These types of wood are more easy to work and are an excellent choice for beginners. It is important to remember that hardwoods can have the same quality and finish while softer woods are not. You should experiment with different types before you settle on a single type.
Softwoods
The first step in carving a wooden face is selecting the softwood to use. Softwoods are harder to carve and can often be knotted. They can also be more fragile if you use long strokes. A beginner carver will frequently cut off small pieces of wood, reducing detail. This is not a big problem, but it is something to be aware.

Some hardwoods are easier to work with than others. Aspen and butternut are the easiest hardwoods to work with. It is recommended to use knives with a higher bevel. Softwoods are easier than hardwoods to work with, and can be carved along the grain or across it. The quality of the final product will be determined by the wood used for carving.
Colored Dyes
You can create a bright, detailed finish to a wood carving by using colored dyes. You can find these in a wide variety of colors and mix them with water or alcohol to create a unique colour. You can mix colored dyes with shellac to make lighter woods. After applying dyes, ventilate your work area and clean your brushes with denatured alcohol. Another option is paste wax. Excessive glossiness can distract you from your work. Use 0000 Steel Wool to remove any excessive glossiness.
Wood dyes are available in several types and can be applied with ease. Wood dyes are compatible with all topcoats and are easy to apply. They solve common finishing challenges. They are easy-to-mix and apply because they are available in a wide range of primary colors. They can also be purchased in different shades so that you can create your own unique colors. They can also be combined to create unique colors.
Shellac
Shellac should be available before you apply it to your wood carvings. A jar of shellac is available, but the best way to apply it to your wood carving is with a brush. A two-pound piece will work well. This is because it will grow slowly and will reduce the brush marks. Because shellac is very thin, it is best to purchase a thicker than a thinner cut. You can make your own pads from cotton lumps the size of golf balls and lint-free cloth. Then, dip the tip of your brush into the shellac and let the excess flow back into the bottle.
Shellac can add color and highlight grain. Shellac comes with a wide range of colors. You can mix different shades to make your own custom blends. You can darken the shade with extra coats of lac. Shellac, unlike other wood finishes won't turn yellow or become cloudy. You can also make more faces with it because it lasts longer. This can be done with any type or wood carving project.
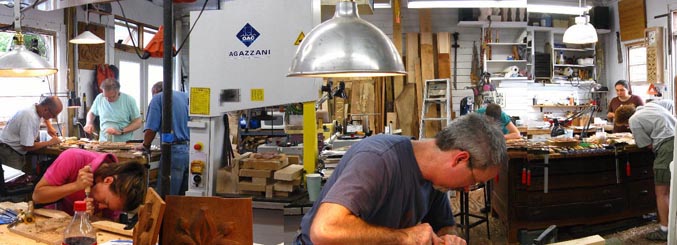
Gouges
There are many different sizes and shapes available for gouges. The straight and the palm gouges types are the most commonly used. Straight gouges are designed to be held by hand while palm gouges have shorter shafts and handles. Hand held carving is easier with the shorter handles. Palm gouges also known as veiners are excellent for carving faces in wooden wood. These are some important things to remember before you begin carving.
First, it is important to understand how to select the correct gouge. The gouge should be capable of carving a small v-shaped groove. A sharp edge and small sweep are essential features of a good gouge. A gouge is often classified according to its size. A 3/10 gouge will create the same-sized cut as an 5/10 gouge. As the first number increases the scoop between edges becomes deeper, and the sweep becomes progressively curvier. A small-sized gouge will be capable of carving a shallow profile.
FAQ
How can I determine which tools are most suitable for me?
It's important that you consider your needs and preferences while shopping for tools. Do you prefer metal handles or plastic? What size of nails and screws do your hands use most? Are you more comfortable using power tools than hand tools?
Do you have the skills to learn woodworking?
Doing is the best way to learn any subject. Woodworking is an art that takes patience, practice, skill and experience. Every craft takes practice and patience.
It is the best way to learn to do something is to actually do it. Start small and then build upon what you've learned.
What wood items do well?
Most wooden items that are best-sellers are made from wood harvested sustainably.
Most furniture is made from oak, maple, mahogany or walnut.
These woods are extremely strong but also have beautiful colors and grain patterns. They will last for many years, if taken care of properly.
To protect wooden furniture from moisture damage, you should paint it first. This covers all surfaces, drawers included, as well as doors and handles.
If you want to make sure that your furniture lasts as long as possible, then you should choose a paint that is resistant to water.
It is recommended to use an oil-based primer, then apply two coats. It is possible to apply multiple coats depending on how heavy the wear.
Spray cans and aerosol spray paints are not recommended. These products can evaporate quickly and emit harmful fumes.
How do I get started with woodworking?
The best way to learn how to build furniture is by building furniture. Although you will need to have tools and may make mistakes along your journey, you'll soon be able to master it.
Begin by choosing the project that you want to finish. You could make something as simple or complex as a box. Or you could build a whole entertainment center. Once you've settled on a project find a local skilled woodworker. Ask them for their advice about the tools and where they can be found. Ask if you can find someone who does this kind work.
Statistics
- Overall employment of woodworkers is projected to grow 8 percent from 2020 to 2030, about as fast as the average for all occupations. (bls.gov)
- The best-paid 10 percent make $76,000, while the lowest-paid 10 percent make $34,000. (zippia.com)
- If your lumber isn't as dry as you would like when you purchase it (over 22% in Glen Huey's opinion…probably over 10-15% in my opinion), then it's a good idea to let it acclimate to your workshop for a couple of weeks. (woodandshop.com)
- Woodworkers on the lower end of that spectrum, the bottom 10% to be exact, make roughly $24,000 a year, while the top 10% makes $108,000. (zippia.com)
External Links
How To
How do I accurately measure wood?
Wood measurement can be done using several methods. A digital caliper is a tool that measures distances. We also use a laser level to ensure your work surface flattens.
A digital caliper can have two jaws, which open and close. The first jaw holds the object, and the second measures the distance between them. The digital caliper can be used to measure small distances such as the thickness of wood.
Laser levels use an infrared beam of light to project a line across the ground. A red dot is created by the laser. The line can be viewed down to determine if the surface has an even surface. Laser levels are ideal for checking the accuracy on large surfaces.
Bubble levels look similar to a compass. The device's center bubble is visible. As long as the bubble remains centered, the device can tell you if the surface has been leveled. Bubble levels can be used for checking the accuracy in smaller areas.