If you've always wanted to carve your own eyes, there's no better way to get started than by following along with a photo trail. This can help you to imitate a famous carving without having to spend hours researching the styles. It's important that your eyes are as accurate as possible. You'll have lots of fun and will likely have great eye-hand coordination. However, if you've never been a talented carver, don't worry. There are many easy ways to achieve realistic-looking eyes!
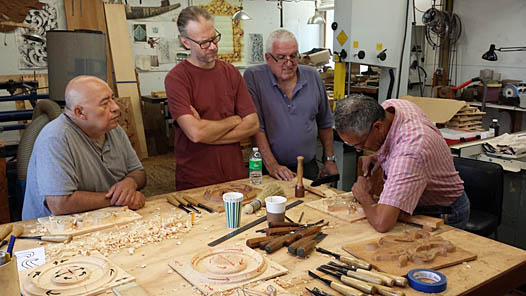
Lesson 4 Carving hair
This tutorial will guide you through the steps of carving a flowing hairstyle on your animal carving. It will allow you to create a lifelike appearance and create an illusion of emotion. You will be able to see the various tools that you can use for creating different textures. To create different levels of hair, you can also learn how to use curved tools. Once you've mastered the basics of hair cutting, you can move on to more difficult parts like the eyeballs or nose.
First, you should outline the eye cavities with a pencil. Next, draw a straightline that runs from the eyebrows towards your eyelids. You can also make the forehead taller and more rounder by using a pencil. Afterward, use a whittling sloyd knife to round the corners of the cheeks and bottom lip, as well as the beard area.
Lesson 5: Carving crow's feet
If you are prone to crow's feet, then you should know what causes them. Repeated facial expressions such as squinting, can lead to wrinkles. Crow's feet can be caused by repeated facial expressions, such as squinting. You should wear reading glasses or sunglasses if you have the tendency to get them. For crow’s feet prevention, you can use facial moisturizers.
The appearance of wrinkles and fine lines on the face can make someone look older than their years. It is possible to remove wrinkles and fine lines from the face, giving you a younger appearance. Here are some helpful tips.
Lesson 6: Carving an iris
Children can see the iris, ocellus and other parts of their bodies in a mirror. This will help them to understand how they feel and look. They can also draw their own eyes using observational drawing and the mirror. They can use observational drawing and mirrors to find different shades of white in the iris or black in central. After they have finished the drawing, they can add colour using different media and try to create the illusion of depth. Children can then compare their drawings of the eyes to see what differences they have in colour.
FAQ
How often should new supplies be purchased?
Some tools will need to be replaced over time. You'll need to sharpen your hand tools regularly if you use them. For power tools, replacement parts will be required frequently. To avoid buying too much at once, try to spread your purchases out over a few months.
What amount of money do I need to get started with my business?
Because every project is unique, there aren't exact numbers. These factors will help you get an estimate of how much money is needed.
-
Material cost
-
Tools and equipment
-
The time spent on the project
-
Your hourly rate
-
What is your expectation for profit?
-
No matter if you are looking to hire someone
If you're just starting out, you may decide to start small by making simple items such as boxes and picture frames. You'll become more proficient as you get experience.
What furniture can I refinish?
Yes! Yes! There are many methods to refinish antique furniture without hiring a professional. Here are some examples:
Use sandpaper for removing stains and scratches. After that, use a clean towel to wipe the surface.
Use clear polyurethane varnish. Before moving furniture, let dry completely.
Use acrylic paint to paint furniture.
You can stain the furniture instead of using paint. The furniture will have a rich look thanks to the stain.
Use shellac wax. You can protect your wood with wax and give it shine.
How can I learn basic woodworking skills
The best way to learn how furniture construction is to make your own bench. This project can be completed with whatever wood you have available at home. If you aren't sure what type of wood to use, you can buy cheap pine boards from Lowes or Home Depot. After building your bench, sand off any rough edges and apply a stain or varnish.
How do you calculate woodworking prices?
When calculating the costs of any project, it is important to keep them as low and affordable as possible. It is important to ensure that you are getting the best materials prices. It is important to take into consideration all factors that can impact the cost of your projects. These include time, skill and experience. If you want to get an idea of what you can expect to spend on different types of woodwork projects, check out our guide to the average price of common household DIY tasks.
Statistics
- Average lumber prices rose about 600 percent between April 2020 and May 2021. (familyhandyman.com)
- The U.S. Bureau of Labor Statistics (BLS) estimates that the number of jobs for woodworkers will decline by 4% between 2019 and 2029. (indeed.com)
- The best-paid 10 percent make $76,000, while the lowest-paid 10 percent make $34,000. (zippia.com)
- Woodworkers on the lower end of that spectrum, the bottom 10% to be exact, make roughly $24,000 a year, while the top 10% makes $108,000. (zippia.com)
External Links
How To
How to make wood joints
This tutorial will teach you how to join two pieces wood together. We'll use the "pocket hole joint," which means we drill holes in the wood and then glue them together. This method is great if your wood's straight and smooth. Dowel joinery might be a better option if your wood is not straight or flat. Here are the steps
-
Drill Pocket Hole Joints. First, measure the area where you wish to place the pocket joint. Then drill 3/4 inch deep holes into the ends of each piece of wood using a jig saw or handheld drilling machine.
-
Sand Smooth. Sanding the edges of the wood will help to prevent the joint from splitting later.
-
Glue both sides together. Apply glue to both sides of the wood. Let the wood sit for 5 minutes, then clamp it together.
-
Attach the Pieces together. After the glue has dried properly, clamp the pieces together to make sure they are flush.
-
Trim Joinery. Trim any excess wood surrounding the joint once the glue has dried completely.
Be sure to leave enough space between each piece so that they can be turned inside-out.