This article will guide you through the process of choosing the right pocket-hole screw, drilling the hole, as well as how to use a Kregjig. You may want to skip this section if you are just starting out. After all, it's easy to screw the wrong size screw into a board. But when it comes to gluing two boards together, using pocket holes is crucial!
The right screw
When you are constructing a woodworking project, choosing the right pocket hole screws for the job is essential. These screws will provide a long-lasting hold and are very versatile. The type of thread you choose depends on the wood. You should use a coarse-thread screw for soft wood. The best pocket-hole Kreg Pocket-Hole Screws for soft woods and sheet goods are the coarse-thread Kreg Pocket–Hole Screws.

Drilling the hole
Before you can use pocket hole screws, drill the hole first. The exit point for the pocket hole should not be more than 1/4 inch from the edge. The exit point should be 25 degrees from where the screw will travel. The correct bit and jig should be used when drilling the hole. The incorrect bit or jig can cause the pocket hole not to be properly centered.
Using a spacer
Woodworking projects require the use of a spacer to place pocket holes. Spacers allow you to avoid mistakes that can cause the screw to twist out of alignment. The screw will stay in place by not twisting if there are two screws on either end of the joint. You should use two screws to attach the joint. This will prevent the screw rotating out of its place.
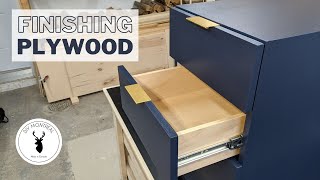
Kreg jigs
Kreg jigs will help you create the perfect drawer or cabinet. These tools feature adjustable collars that move in and out based on the material you're using. When the drill is complete, waste will come out the bottom of the drill guide. To keep the jig clean, make sure to clean step bit flutes before using it again.

Wood plugs
Wood plugs can be used with pocket hole screwdrivers to cover any exposed edges and ensure proper installation. Wood plugs can easily be found at hardware stores. Drill a 3/8" hole in the pocket holes from scrap wood and then replicate the process with wood plugs. Next, cut the plug flush with a flush cutter saw. Another option is to use a plug cuter to prevent uneven surfaces.
FAQ
How often do I need to buy new supplies
You'll probably have to replace some of your tools over time. If you are using hand tools, you will need to sharpen them frequently. Power tools will require replacement parts every so often. Try spreading your purchases over a few months so you don't buy too many at once.
What woods can be used to make furniture?
Woods are classified according to their hardness. Softwoods are pine, cedar and cypress. Because they are resistant, they can be used for outdoor furniture. The hardwoods are oak, maple and mahogany. They can't withstand the elements outside so they're best kept indoors.
Does it take a genius to make woodworking work?
No. No. Woodworking isn't rocket science. It is possible to learn basic tools and techniques that will allow you to create beautiful art.
How do I calculate woodworking prices
The most important thing to remember when calculating costs for any project is to keep them as low as possible. Make sure you're getting the best prices on materials. It's also worth taking into account all the other factors that may affect the cost of your projects, such as time, skill level, and experience. Check out our guide on the average cost of common DIY projects to get an idea of how much you can spend on woodwork projects.
What kind wood should I use for my project?
The most commonly used woods for woodworking are oak, maple, cherry. Every type of wood is different and can have a unique look and feel that will affect the final product. Oak tends to be harder and darker than other woods. Birch is light and soft, while mahogany can be heavier and more dense. You can also pick between veneers and solid wood. Veneers consist of thin sheets made from wood and glued together to form a single layer.
Statistics
- If your lumber isn't as dry as you would like when you purchase it (over 22% in Glen Huey's opinion…probably over 10-15% in my opinion), then it's a good idea to let it acclimate to your workshop for a couple of weeks. (woodandshop.com)
- Woodworkers on the lower end of that spectrum, the bottom 10% to be exact, make roughly $24,000 a year, while the top 10% makes $108,000. (zippia.com)
- The best-paid 10 percent make $76,000, while the lowest-paid 10 percent make $34,000. (zippia.com)
- Most woodworkers agree that lumber moisture needs to be under 10% for building furniture. (woodandshop.com)
External Links
How To
How to properly use a handsaw
The wood is cut into pieces using a hand saw. Most common hand saws include circular saws (jigsaws), table saws and band saws. A handsaw can be made of metal or other plastic. It cuts through material such as wood and plastics.
Hand saws have the main advantage of cutting at precise angles without needing to adjust the blade. The blades can also be sharpened easily, which is not possible with power tools. There are also some drawbacks. These devices are bulky and heavy so you need to be careful when transporting. It is possible to injure or damage your own body if the instructions are not clear.
There are many ways you can hold a saw. While cutting, keep your fingers away from the blades. If you don't, you might get hurt. When holding the saw, you should place your fingers around the handle, keeping your thumb up near the top of the blade. This way, you won't accidentally touch the blade.
When using a hand saw, you should never put anything under the piece of wood you're cutting. This could cause the blade to slip from the wood's surface. Always check the area where you want to cut before starting. Make sure no nails or screws are hidden beneath the wood.
While working with a saw, you should always use safety goggles. These glasses prevent dust from entering your eyes and make it easier for you to see what's happening. Safety glasses can also be useful as they protect your skin from flying debris.
Before you start working with a saw, it is important to learn how to use it safely. After that, practice until it becomes comfortable enough to start cutting. Once you are comfortable with the basics, you will be able cut almost any material.