
This eBook will teach you 9 key woodworking techniques that are used by professional woodworkers. You'll get detailed instructions and videos for every technique. Also, learn how you can make the Dovetail Jig. With this eBook, you can create a perfect Dovetail every time! Let's start by looking at some common mistakes made by beginners. Continue reading to avoid making these errors.
Dowel trick
Dowels are a wonderful tool in woodworking. It can also be used to mark the perfect spot for drilling holes in boards. You can also use this trick to dry-fit two pieces of wood by using the ends of a dowel as a center. To dry-fit the two pieces of lumber, place the dowel inside each board's hole. Make sure the dowel centers match up.

Cleaning up glue
While glue is an essential tool in woodworking, it is also a messy and time-consuming process. While rubbing your hands together with glue can help get rid of excess glue, soaking your work in sawdust can lead to wood swelling. Avoid rubbing wet glue onto your work as it can cause it to swell when it is finished. Instead, use sawdust as a barrier between wood and glue.
Story stick
Measuring accurately is one of many tricks in the woodworking trade. The story stick helps you spot any obstructions to the placement of your base cabinets, such as walls, plumbing, or wiring. These obstructions can be used to help you plan where your cabinets should go. By using a story stick as a template, you can make your projects easier. You can make woodworking more enjoyable by using story sticks.
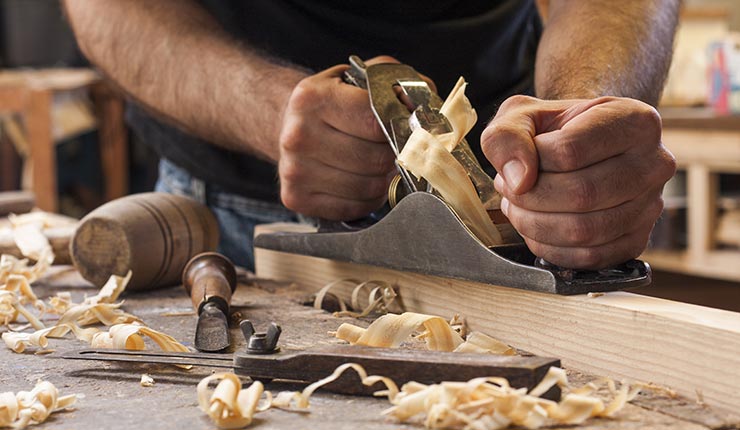
Dovetail jig
The dovetail-jig is just one tool you can use when woodworking. You can make many types of joints using one tool. The jig works both indoors and outdoors. The jig is strong and won't heat up even when it is used often. It can be purchased in many different styles, but it is important to remember that the more versatile a dovetail jig is, the more expensive it will be.
Toenail trick
The toenail tactic is a woodworking technique that will help you save lots of time. You need to know where you should start and how to angle the nail when framing a piece. It is important to angle the nail downwards at 45 degrees. To do this, hold the board with your toe and visualize the nail's path. Use your toe to hold the board in place and drive the nail at the right angle.
FAQ
What's the difference?
Hobbyists enjoy creating things out of wood. Professionals tend to focus on the quality. Hobbyists take great pride in their creations, and share them with family and friends. Professionals will spend hours looking at designs before they start to build a project. They will meticulously plan every detail of their work from choosing the right materials to finishing it.
What is the difference between plywood and particle board?
Plywood is made up of layers of wood pressed together under pressure. Plywood can come in many thicknesses and is used for flooring and cabinets. Particle board is made up of sawdust mixed in resin, then compressed into large pieces. This board is commonly used in home improvement projects. Both types of boards are durable and easy to cut.
How can you calculate the woodworking price?
The most important thing to remember when calculating costs for any project is to keep them as low as possible. Always ensure you are getting the best possible price for materials. It is important to take into consideration all factors that can impact the cost of your projects. These include time, skill and experience. Our guide to the average household DIY task price will give you an idea of how much it costs to complete different types of woodwork projects.
What would be your first step in woodworking?
You can start with softwoods like pine or poplar. When you feel confident with these two, move on towards hardwood.
Are you able to teach yourself woodworking
Learning by doing is the best way of learning anything. Woodworking is an art that takes patience, practice, skill and experience. Every craft takes practice and patience.
It is the best way to learn to do something is to actually do it. Start small and then build upon what you've learned.
Where can I locate free woodworking plans
You don't need to purchase any books or magazines to find free woodworking plans. You just need to search Google. Just enter "free woodworking" into the search bar, and you'll see hundreds of websites where you can download free plans.
Statistics
- Overall employment of woodworkers is projected to grow 8 percent from 2020 to 2030, about as fast as the average for all occupations. (bls.gov)
- Woodworkers on the lower end of that spectrum, the bottom 10% to be exact, make roughly $24,000 a year, while the top 10% makes $108,000. (zippia.com)
- If your lumber isn't as dry as you would like when you purchase it (over 22% in Glen Huey's opinion…probably over 10-15% in my opinion), then it's a good idea to let it acclimate to your workshop for a couple of weeks. (woodandshop.com)
- The U.S. Bureau of Labor Statistics (BLS) estimates that the number of jobs for woodworkers will decline by 4% between 2019 and 2029. (indeed.com)
External Links
How To
How to make wood joints
This tutorial will show you how to join two pieces of wood together. We will be using the "pocket-hole joint", which involves drilling holes in wood and then gluing them together. This method works great if your wood is straight and smooth. You might consider dowel joinery if your wood isn’t straight or flat. Here are the steps
-
Drill Pocket Hole Joints. To start, measure and mark where you want to put the pocket hole joint. With a handheld drill machine or jig saw, drill 3/4-inch deep holes in the ends of each piece.
-
Sand Smooth. Sanding the wood's edges will ensure that the joint doesn't split.
-
Glue Together. Apply glue on both sides of the wooden plank. Allow it to cool for at least 5 minutes before you attach the pieces.
-
Clamp the Pieces Together. After the glue has dried completely, you can clamp the pieces together until they are flush.
-
Trim Joinery. Trim the excess wood around the joint after the glue has dried completely.
Allow enough space between pieces so you can turn them inside out.