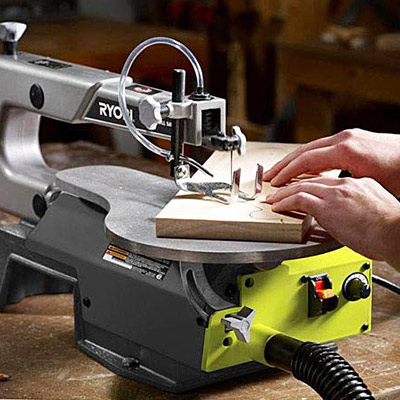
Before you begin cutting picture frame pattern, it is important to understand the basics of a Scroll Saw. This article will guide you through how to use your scroll saw to cut patterns. This article will also show you how to create picture frames using scroll saw patterns. Before you start cutting with a scrollsaw, you will need one. Make sure the scroll saw you are buying is the right size.
Basics for a scroll saw
Scroll saws make beautiful picture frames and holders. There are two main types: flat, tabletop display and wall hanging. For both types of projects, you'll need to cut multiple pieces of wood with different sizes and shapes. You will need multiple layers of wood to create a 3D scrollsaw pattern.
Before you can start cutting, it is important to choose a scroll saw template that suits your level of skill. You can find thousands of free patterns online. Many patterns can easily be followed by beginners. Some are more complicated. A lot of these patterns are easy to follow, and you can easily find a suitable one. Finish your frame by applying wood varnish or lemon oil. This will help protect it from future damage.
A self-contained puzzle about Noah's Ark is another simple scroll saw project. This pattern is available in printable format, so it's an excellent way to test your skills. Then, if you prefer a puzzle, there are several printable patterns for this project. A VW Beetle Puzzle can be made if you're not familiar with using a scrollsaw. It's more than a pretty frame. It also gives you a mental workout. A professional scroll saw pattern or DIY tutorial are both great options if you're looking for an easy project that doesn't require a lot of time.
Basics of cutting patterns with a scroll saw
You may be interested in making wooden picture frames yourself. Learn how to use a scrollsaw to create picture frame patterns. Patrick Spielman's book is filled with new ideas that you can try. The book has more than 30 patterns. Each one uses a different scrolling technique, which is a departure from other books. Learn about copying, sizing and transferring patterns.

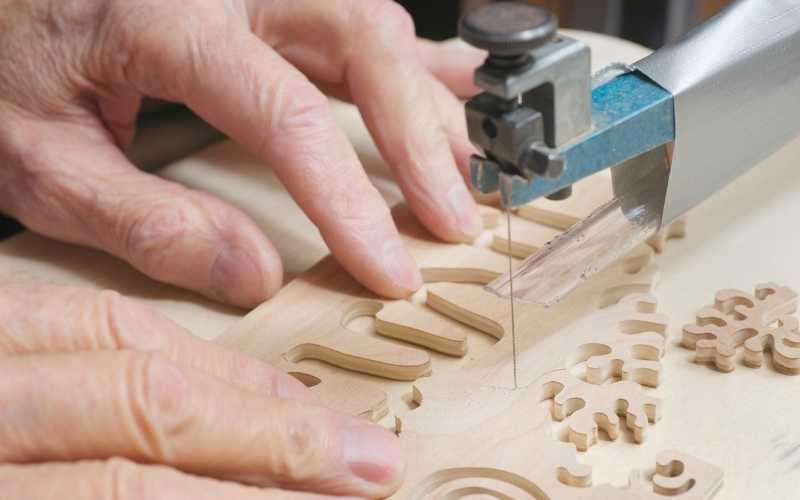
It's easy to create picture frame patterns if you have a scroll saw. This technique is used in many of the most popular picture frames. This makes it more precise as the pieces will nest together when cut. Double beveling is achieved by tilting the table as you go. This kind of marquetry can also be called "artistic hardwoodworking" and is great for those just beginning the craft.
A scroll saw can be bought online for less than $40 Scroll saws available online are usually basic models that have been around for a while, but they are in good shape. It is a great way to learn how you can cut picture frames by purchasing a scrollsaw online. There are many sites where you can buy used scrollsaws. These websites provide a large selection of models and prices, even if you don't have a lot to spend.
Making picture frames with a scroll-saw: The basics
Making picture frames with a scroll saw can be challenging and requires an extensive knowledge of the tool. The book covers basic scrolling techniques, and gives examples of different styles. All picture frames are composed of two main boards. There is one main board that has an opening for the picture and another smaller face frame that glues on top to hold it. This book is a wonderful guide for beginners, despite the complex steps involved.
This book offers many projects ideas for beginners in scroll saw. This book has 32 different designs that you could create using the scrollsaw. Each frame design has many variations. Because no two frames are the same, the book can be used as a pattern book. Below are some examples of techniques that you could use. You can learn them and experiment with other scrolling techniques until you find the best one for your picture frame project.
FAQ
What tools are used by carpenters?
A hammer is the most commonly used tool by carpenters. The hammer is used to pound nails into wood. It is also used to help hold pieces together while working on a job. Other tools include clamps, pliers, screwdrivers, measuring tape, pencils, saws, drills, and wrenches.
What is the difference in plywood and particleboard?
Plywood is made up of layers of wood pressed together under pressure. Plywood is available in a variety of thicknesses. It is often used to make cabinets or flooring. Particle board is made up of sawdust mixed in resin, then compressed into large pieces. It's commonly used for home improvement projects. Both types are sturdy and easy to cut.
How long does it take for furniture to be finished?
It depends on the wood type you choose, the complexity and the amount you apply to the finished product. Hardwoods require more care than softwoods. Hardwoods also tend to be more expensive than softwoods. But they last longer and resist moisture better. The typical time taken to finish a piece furniture takes anywhere from one to three month.
How can I learn basic woodworking skills
A great way to start learning how to build furniture is by building a simple bench for yourself. You can do this project using any type of wood you have on hand at home. If you don't know what kind of wood to use, then go ahead and buy some cheap pine boards from Home Depot or Lowes. After you've built your bench, you'll want to sand off all the rough edges and finish it with a stain or varnish.
How do you know which type of wood you are working with?
Always read the label when purchasing wood. The label should include information about the wood species and its moisture content as well as whether or not it has been treated using preservatives.
What kind of wood should you use?
There are many wood types that are used in woodworking, including oak, maple and birch. Each type of wood has unique characteristics that affect the look and feel of the final product. For example, oak tends to be darker and harder than other woods. Birch is soft and lightweight, while mahogany is denser and heavier. There are two options: solid wood and veneers. Veneers are thin sheets of wood that are glued together to form a single layer.
What furniture can I refinish?
Yes! Yes! There are many methods to refinish antique furniture without hiring a professional. Here are some suggestions:
Use sandpaper to remove scratches and stains. Next, wipe the surface clean with a damp cloth.
Apply clear polyurethane paint. Allow furniture to dry completely before you move it around.
Acrylic paint is a great way to paint furniture.
Instead of painting, use stain. The stain will give the furniture a rich look.
Shellac wax is applied. This will protect and shine the wood.
Statistics
- In 2014, there were just over 237,000 jobs for all woodworkers, with other wood product manufacturing employing 23 percent; wood kitchen cabinets and countertop manufacturing employing 21 percent. (theartcareerproject.com)
- Woodworkers on the lower end of that spectrum, the bottom 10% to be exact, make roughly $24,000 a year, while the top 10% makes $108,000. (zippia.com)
- If your lumber isn't as dry as you would like when you purchase it (over 22% in Glen Huey's opinion…probably over 10-15% in my opinion), then it's a good idea to let it acclimate to your workshop for a couple of weeks. (woodandshop.com)
- The U.S. Bureau of Labor Statistics (BLS) estimates that the number of jobs for woodworkers will decline by 4% between 2019 and 2029. (indeed.com)
External Links
How To
Tips for driving a nail in wood
First, choose the right size and type of tool to drive a nail through wood. The most commonly used types of Hammers are claw hammers. Each kind of hammer has its own advantages and disadvantages. A clawhammer works best when hitting something hard like nails. However, it can sometimes be difficult to see exactly where the strike is going. A sledgehammer is useful for striking large areas at once but too heavy to be effective for smaller tasks.
After selecting the right hammer, you will need to place your hand flat against one side of the head. The handle should rest comfortably in your hands. Hold the handle in your hand, but don’t force it too hard that you break. The hammer should be held straight up with your wrist relaxed. You should then swing the hammer straight up, keeping your wrist relaxed. You should feel the impact of the hammer striking the nail. You can practice swinging the hammer with a block or wood until you feel the rhythm.
Hold the hammer near your body until you're ready for the nail to be driven. You will need to position the nail so it is parallel to the wood. Keep your focus on the tip of each nail. Swing the hammer forward, then follow through with the motion of the hammerhead. Continue this motion several times, slowly increasing the speed of each swing. Try adding power to your swings when you've mastered the technique. To make it more powerful, hold the hammer up high to your shoulder and then bring it down. You'll have more energy to work with.
After you have nailed the hole, take the hammer off the nail. To pull out the remaining nails, use a screwdriver or pry bar. Keep the nail heads parallel to the board's surfaces in order to avoid splitting wood.