It is important to know what you need to do in order for you to start woodworking. Here are some of the main things to consider when setting up your shop: Bench dogs, Cabinets, and Dust collection systems. Here are some simple tips for making your shop productive. Learn how to arrange your workbench in a way that is easy for you. Remember to give your bench dog a happy life. You will need them in the near future.
Workbench placement
The workbench is one of the most important things you need to have in your woodworking shop. A workbench is a solid surface that you can work on. It also serves as a vice for holding the wood in place while you shape and cut it. Also, it is important to have adequate storage space for all of your power tools and hand tools. Proper storage is critical for making woodworking easier. Here are some helpful tips for choosing the right workbench.
Dust collection system
You can install a dust collection system in your woodworking shop using a variety of different systems. The right system can make woodworking safer and more enjoyable, so choose one that fits your needs. Dust collection systems can make your work easier and will save you time cleaning up after each job. A shop vac can be used to tidy up your woodworking shop. This will help you save time and reduce the amount of cleaning required.
Cabinets
There are many important things to consider when choosing cabinets that will be used in a woodworking shop. You need an area for storing tools, lumber and supplies. Additionally, you'll need an area to store your tools, lumber, and other supplies. Ideally, your workshop layout will include plenty of space between your bench and walls to facilitate working and moving around. Your workshop setup should also account for efficient dust collection. Dust from power tools such as sanders can be very large. Dust collection systems are able to eliminate most of the dust.
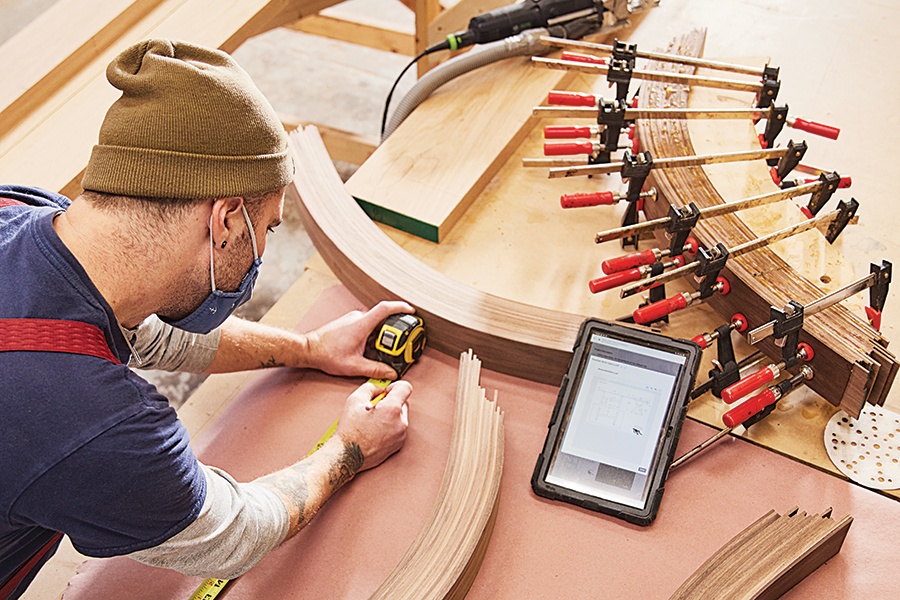
Bench dogs
A set bench dog is an essential accessory for any woodworking shop. While bench dogs can be bought at a variety of prices, you can also make them yourself. These clamps can be used to hold items like wood, nails, or chisels. It is possible to draw a diagram and figure out how many dog holes are needed. Each hole should have a dowel rod that fits snugly into it.
Storage units
Your woodworking shop may not contain enough tools. However, once you've begun making items, you will likely have plenty of inventory. You might have enough inventory to make more items and order them for customers. Renting storage units is a smart business move. Your inventory will have plenty of room, and you can keep your office clutter-free. In addition to renting storage units, you can also buy shelves and organizers to store your supplies and finished projects.
FAQ
How can I keep my shop organised?
Setting aside an area to store tools is the first step in keeping your workshop organized. Your tools will stay sharp and ready to go when they are free from dust and debris. Pegboard hooks can be used to hang tools and accessories.
What wooden items do you sell well?
Most wooden items that are best-sellers are made from wood harvested sustainably.
The most popular types of wood for furniture include oak, maple, cherry, mahogany, walnut, and teak.
These woods are extremely strong but also have beautiful colors and grain patterns. They can also last for years if they are properly cared for.
To protect wooden furniture from moisture damage, you should paint it first. This applies to all surfaces including drawers, doors, handles, and handles.
Paint that is water-resistant will ensure furniture lasts for a long time.
A high-quality oil-based primer should be used, followed by two coats with top coat. Depending on the amount of wear, you may need several coats.
Avoid spray cans or aerosol colors. These products have solvents that evaporate quickly, leaving behind dangerous fumes.
How much should a Woodworker Charge per Hour?
The hourly rate for a professional woodworker varies depending on many factors, including skill level, experience, availability, location, and other variables.
The average hourly rate for a skilled woodworker ranges from $20-$50 an hour.
A woodworker with less experience may be able to charge $10 an hour.
How do I identify the type of wood that I am dealing with?
Always read the label when purchasing wood. The label should contain information about the wood species, its moisture content, and whether it has been treated with preservatives.
Statistics
- The best-paid 10 percent make $76,000, while the lowest-paid 10 percent make $34,000. (zippia.com)
- Most woodworkers agree that lumber moisture needs to be under 10% for building furniture. (woodandshop.com)
- In 2014, there were just over 237,000 jobs for all woodworkers, with other wood product manufacturing employing 23 percent; wood kitchen cabinets and countertop manufacturing employing 21 percent. (theartcareerproject.com)
- If your lumber isn't as dry as you would like when you purchase it (over 22% in Glen Huey's opinion…probably over 10-15% in my opinion), then it's a good idea to let it acclimate to your workshop for a couple of weeks. (woodandshop.com)
External Links
How To
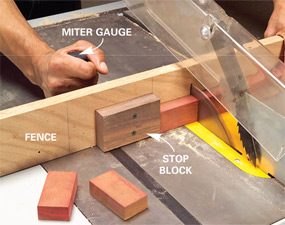
How to make wood joints
This tutorial will demonstrate how to join two pieces together of wood. We will use the "pockethole joint," which means that we drill holes in the wooden pieces and then glue them together. If your wood is straight and flat, this method will work well. You may want to consider other methods, such as dowel joining. Here are the steps
-
Drill Pocket Hole Joints. Start by measuring and marking the spot where the pocket hole joint will be placed. With a handheld drill machine or jig saw, drill 3/4-inch deep holes in the ends of each piece.
-
Sand Smooth. Sanding the wood's edges will ensure that the joint doesn't split.
-
Glue together. Apply glue to both ends of the wood. Let it sit for about 5 minutes before clamping the pieces together.
-
Secure the pieces together. After the glue has dried completely, you can clamp the pieces together until they are flush.
-
Trim Joinery. After the glue dries completely, trim off any excess wood around the joint.
To be able to turn the pieces inside-out, leave enough room between them.