John Jordan's tools are high quality and can be used in your shop. The company was originally known as Victoria Tool Corporation. The company is located in Warren Michigan and produces a wide range of products for die- and weld gun components. The company manufactures shims. These items can be used in any shop or profession.
John Jordan
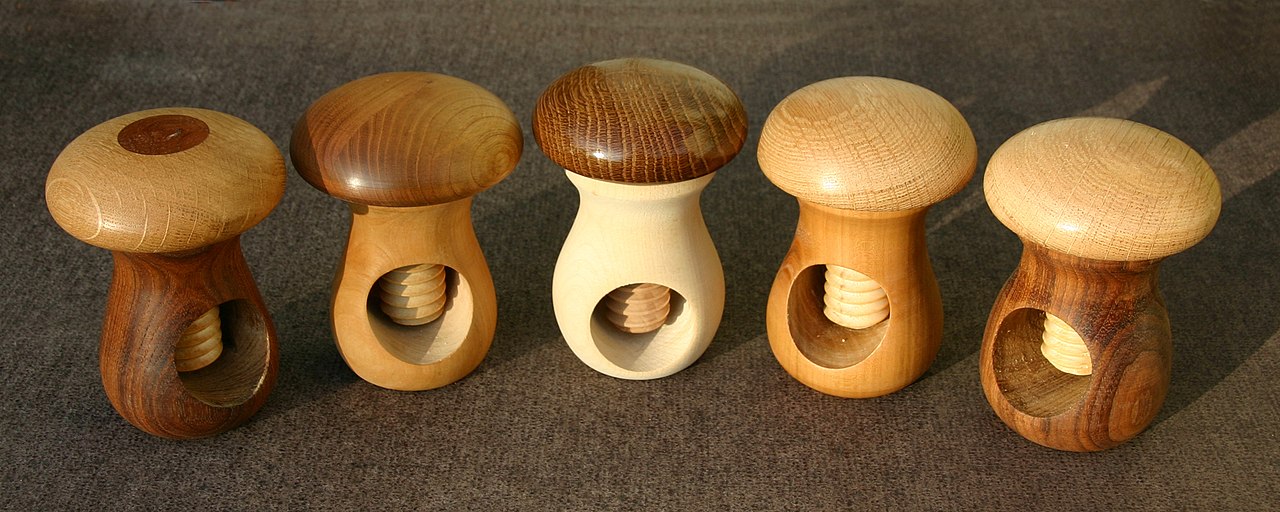
John Jordan, a world-renowned woodturner, instructor and maker of fine John Jordan tools, is well-known for his innovative techniques as well as finely crafted tools. His years of experience has allowed him to perfect the tools. His talent for texturing and creative detail is legendary. Some of his finest pieces of work have been displayed at the Smithsonian's Renwick Gallery. Here, John Jordan discusses the tools that are essential for making fine-tuned woodturning objects.
John Jordan has a range of tools for turning: chisels and gouges. He finishes his cut with a fine ceramic Slip-stone and an angled gouge with a small Burr. This technique creates a smooth finish, without texturing imperfections. He used a long edge of the gouge for this purpose, and he also used a special tool for this task. It features a narrow handle, a straight edge with a reversible angle and a slight scar.
John Jordan Turning Tools
John Jordan Turning Tools are a popular tool for woodturners. Tennessee's master woodturner, John Jordan, has created hollow vessels which have been featured in virtually every major turning exhibition for the last twenty years. He has also received numerous awards and other recognitions for his work. His products are in many museums and corporations' permanent collections, including London’s Victoria and Albert Museum. Here are some of his top tools:
John opens his presentation with a basic introduction to wood. Then, John explains the wood's properties and shows you how to plan your turn. He also provides examples of greenwoodwork and explains how you can avoid checking your finished pieces. Finally, you will learn how to use John Jordan Turning Tools in order to make stunning pieces that stand apart from the rest. You have come to the right place if you are a dreamer of becoming a master turner.
Straight Tools
Straight Jordan Tools is a series of handpieces designed to hold small and big tools. They have a 1-1/4" diameter and are available in lengths of twelve, eighteen and twenty-four inches. They are made of steel with a foam grip. Straight Handles will hold tools with diameters of 1/2" or 3/4". A 3/8" adaptor is also available for smaller tools. These handpieces are also designed to resist rust.
John Jordan designed hollowing tools that are an integral part of furniture-making. These tools have been around for over two decades. You can find them in two main styles: Straight Tools and Hook Tools. These tools are designed to reach both the side and the shoulder of the turning. They are held in place by a set bolt and can be removed to be sharpened with a special Jig. The Straight Jordan Tool can be used to make a fine-tuned, swan neck, and a perfect-edged circular.
Precision Screws
Screw turning is only possible with precision. Precision screws can be ordered in both long and short lengths. Jordan Tools makes high-quality precision screws, including the patented X-Rite screw threading system. Moreover, they offer a variety of specialized tools, such as the Y-Rite threaded studs. Jordan Tools is available to help you insert and remove screws, no matter if you are a homeowner or professional.
Jordan Tools is a multi-generational family business located in Warren Michigan. They supply the aircraft and automobile industries. The company originally focused on manufacturing automotive components. But, in 1963, the company expanded to the aircraft sector. The company supplies Tier One companies and maintains a full inventory. It has a large inventory that allows it to satisfy the demands of its many customers. Additionally, it offers fast lead times for out of stock components. The company strives to provide its clients with the highest quality products at competitive prices.
JameyJordan Series single Art Roll

Jamey Jordan Series single arts rolls are a great choice. The first is that the single art roll offers you flexibility. A nylon bottom die on an upper art roller makes it more flexible and easier than traditional single-art rolls. The upper art roll can be made from stainless steel, while the lower one is made from nylon. Each type of art roll is used for different purposes. Jamey's Signature Series beadroller is a good choice for anyone just starting to beadroll.
Jamey Jordan Signature series single art roll step kits are durable and versatile. The kit includes a Friday tour and a Saturday class with dinner. It's designed for custom fabrication. You can ask the company for a demonstration if there are any doubts. They will happily show you how the tool works. The class will cost around 1000 per attendee. Alternatively, you may visit the Mittler Brothers showroom. There you will be given a video tutorial which will show you how to use your tools.
FAQ
How much will it cost to get started?
Because each project is unique there are no exact numbers. But if you want to get an idea of how much money you'll need, consider these factors:
-
Material cost
-
Tools and equipment
-
Time spent working on the project
-
Your hourly rate
-
How much profit do you expect to earn
-
You can hire help, regardless of whether you have a plan.
Start small, if possible. You can make simple boxes or picture frames if you're just getting started. You'll become more proficient as you get experience.
What tools should you start with to become a woodworker
Woodworking takes practice and patience. It takes time for you to master the different techniques and tools that are required to woodwork.
There are many kinds of woodworking equipment currently on the marketplace. Some people prefer using power tools while others prefer hand tools.
You have the freedom to choose what tool you want, but it is important that you select the right tool for your job. If you don't have any experience, you may consider starting with a basic set of hand tools.
Another option is to learn how to use a router, which is used for cutting intricate shapes into wood. These are available at most hardware stores.
Are there any tips for starting a woodworking enterprise?
It's not easy to start your own woodworking business. But if you're passionate about your hobby, you won't mind putting in the effort. You'll enjoy the challenge and rewards of owning your own business.
It is important to remember that unexpected problems may arise when you start a new venture. You might run out money, or you may have to borrow unexpectedly. Or maybe you'll find that customers aren't willing to pay as much as you'd hoped. Preparedness is key to survival in such situations.
Set up a separate account in your bank for your business. You'll be able to track how much money comes in and out.
What's the time taken to finish a piece furniture?
It depends on what size piece of furniture you have. You can finish smaller projects, such as boxes or picture frames, in one day. Larger projects like dining tables and desks require several days. It takes time for the wood to be stained and sealed properly.
What types of woods are best for furniture making?
Woods are classified based on their hardness. Softwoods can be pine, fir or cedar. They're often used for outdoor furniture because they don't rot easily. The hardwoods are oak, maple and mahogany. They are generally indoors as they don't weather well outside.
What is the difference between a hobbyist or a professional woodworker, and how can you tell?
Hobbyists are passionate about making things from wood, while professionals tend to be more focused on the quality and craftsmanship of their work. Hobbyists tend to take pride and share their creations with family and friends. Professionals will spend hours researching designs and then begin to create a project. Professionals will be meticulous about all aspects of their work, from selecting the right materials to finishing it.
Statistics
- The U.S. Bureau of Labor Statistics (BLS) estimates that the number of jobs for woodworkers will decline by 4% between 2019 and 2029. (indeed.com)
- The best-paid 10 percent make $76,000, while the lowest-paid 10 percent make $34,000. (zippia.com)
- Most woodworkers agree that lumber moisture needs to be under 10% for building furniture. (woodandshop.com)
- Average lumber prices rose about 600 percent between April 2020 and May 2021. (familyhandyman.com)
External Links
How To
Tips on how to drive a nail in wood
It is essential to pick the right size and style of hammer before you can drive a nail in wood. There are many types of hammers that you will find: claw hammers and sledgehammers; mallets; ball peen hammers; and hatchets. Each type of hammer comes with its advantages and disadvantages. A claw hammer works well when you're trying to hit nails with a heavy hammer. However it is difficult to precisely control where the blow hits. A sledgehammer allows you to hit large areas simultaneously, but it is too heavy and cumbersome to use for small tasks.
After you've chosen the right tool, hold your hand flat to the handle so it rests comfortably in one of your palms. Hold the handle in your hand, but don’t force it too hard that you break. The hammer should be held straight up with your wrist relaxed. Swing the hammer back towards the ground, with your aim at the middle of the nail. You should feel the impact on the nail from the hammer. If you're having trouble getting the hang of swinging a hammer, practice with a block of wood until you get the rhythm down.
The hammer should be held close to your body when you are ready to begin driving the nail. Place the nail so that it is perpendicular with the wood's surface. Your eyes should be focused on the nail's tip. Move the hammer forward and then continue to move the hammerhead. This can be repeated several times to increase the speed of your swing. Try adding power to your swings when you've mastered the technique. Hold the hammer high above your shoulders and pull it down. This way, you'll be able to put more energy behind your blows.
Once you've nailed the first hole, remove the hammer from the nail. Use a pry bar or screwdriver to pull out the rest of the nails. To prevent splitting the wood, ensure you keep the nail heads flush against the board's surface.