If you've always wanted to carve your own eyes, there's no better way to get started than by following along with a photo trail. It can be a great way to emulate a famous carving without spending hours researching different styles. After all, you want your eyes to be as realistic as possible, and you'll likely have a lot of fun doing it. Do not worry if your skills aren't up to par. There are many ways to get realistic-looking eyes.
Lesson 4: Carving hair
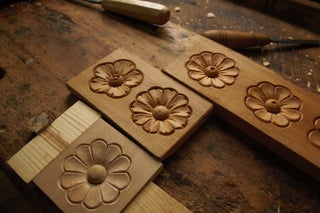
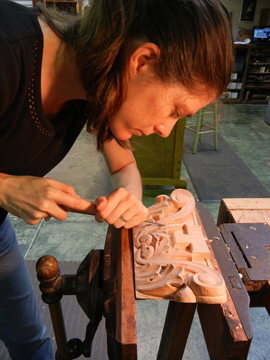
This step-by-step carving tutorial will show you how to carve a beautiful flowing hair on the eyes of your animal carving. It will allow you to create a lifelike appearance and create an illusion of emotion. It will also demonstrate the different tools you can use to make the different textures of hair. Learn how to use different curved instruments to create different levels. Once you've learned the basics, it's time to move on to the more complicated parts, like the eyeballs, nose, and nose.
First, you should outline the eye cavities with a pencil. Next, draw straight lines that extend from the eyebrows to the eyelids. To make the forehead more round and higher, you could also use a pencil. After that, you can use a whittling blade to round out the corners and the bottom lip.
Lesson 5 Carving the feet for the crow
Crow's feet are something you need to know if you have them. Repeated facial expressions (such as squinting) can lead to these wrinkles. Therefore, if you are prone to crow's feet, you should use reading glasses or invest in a pair of sunglasses. To prevent crows' feet, facial moisturizers are also an option.
Face wrinkles and fine lines can make people look older than they actually are. You can easily reduce these lines to give your complexion a younger look. These are some helpful tips.
Lesson 6 - Carving an Iris
For this lesson, children can look at the iris and ocellus in a mirror to see how they appear and feel. They can also use observational drawing and a mirror to draw their own eyes. They can search for white, or other shades of the same colour, in the iris. The black is in the middle. After they have finished the drawing, they can add colour using different media and try to create the illusion of depth. Children can then look at each other's drawings of eyes and compare how they differ in colour.
FAQ
How do I get started as a woodworker?
Woodworking is an art that takes patience and practice. It takes time to master all the tools and techniques involved in woodworking.
There are many woodworking tools on the current market. Some prefer to use power tools and others prefer hand tools.
Your choice, however, is up to you. However, you need to ensure that the tool you use is the right one for the job. You might start with a simple set of tools if you don't have much experience.
You might also want to learn how a router works, which allows you to cut wood into intricate shapes. These can be found at most hardware shops.
What's the difference?
Hobbyists are passionate about making things from wood, while professionals tend to be more focused on the quality and craftsmanship of their work. Hobbyists take great pride in their creations, and share them with family and friends. Before they start working on a project, professionals will spend hours researching the designs. They'll be meticulous about every aspect of their work, from choosing the best materials to finishing it perfectly.
How often should new supplies be purchased?
You will likely need to replace some tools over time. If you are using hand tools, you will need to sharpen them frequently. You'll also need to replace parts if you use power tools. Spread your purchases over several months to avoid purchasing too many items at once.
Statistics
- Woodworkers on the lower end of that spectrum, the bottom 10% to be exact, make roughly $24,000 a year, while the top 10% makes $108,000. (zippia.com)
- Average lumber prices rose about 600 percent between April 2020 and May 2021. (familyhandyman.com)
- The U.S. Bureau of Labor Statistics (BLS) estimates that the number of jobs for woodworkers will decline by 4% between 2019 and 2029. (indeed.com)
- Most woodworkers agree that lumber moisture needs to be under 10% for building furniture. (woodandshop.com)
External Links
How To
How to drive a nail through wood
It is essential to pick the right size and style of hammer before you can drive a nail in wood. There are many types of hammers that you will find: claw hammers and sledgehammers; mallets; ball peen hammers; and hatchets. Each type of hammer comes with its advantages and disadvantages. A claw hammer is best for hitting nails or hard objects. However, it can be difficult to pinpoint exactly where the blow will land. A sledgehammer is useful for striking large areas at once but too heavy to be effective for smaller tasks.
Place your hand flat on the side of your chosen hammer so that the handle rests in your palm. You can grip the handle with your fingers, but not so tight that it causes injury. The hammer should be held straight up with your wrist relaxed. Swing the hammer back towards the ground, with your aim at the middle of the nail. You should feel the impact of the hammer striking the nail. If you're having trouble getting the hang of swinging a hammer, practice with a block of wood until you get the rhythm down.
Once you are ready to drive the nail, place the hammer close to your body. To ensure that the nail is perpendicular on the surface of the wooden floor, position it. Keep your eyes focused directly on the tip of the nail. Swing the hammer forward, and then move the hammerhead. Continue this motion several times, slowly increasing the speed of each swing. Try adding power to your swings when you've mastered the technique. Try holding the hammer above your shoulder and bring it down forcefully. You'll have more energy to work with.
Once you've made the first nail hole, take out the hammer. To remove the remainder of the nails, you can use a screwdriver/pry bar. You should ensure that the nails are flush with the board's surface to avoid splitting the wood.